
I recently received a Steam Deck and one of the first things I wanted to do was install TBC Classic. I was able to do so but needed to use two different video guides and several Reddit searches to get all the details. So I wanted to document every step of installing WoW on the Steam Deck in one place.
These instructions will work for any version of World of Warcraft: Classic, Retail, or Season of Mastery. It’ll also work with any other game installed and run from the Battle.net app.

Required Hardware | Proton-GE | Battle.net | WoW
Custom Artwork | WoW Directory Shortcut | Addons | Discord | ConsolePort | TSM
Moderately Difficulty and No Official Support
To install WoW on a Steam Deck, as well as other Battle.net games, doesn’t require IT experience, and plenty of others have gotten it to work and shared their experience before me. But you need to be aware that the process isn’t as quick and easy as it is on your regular gaming PC. Battle.net does not have a Linux version (the OS used by the Steam Deck) and Blizzard has stated they have no plans to support the Steam Deck.
In addition to OS compatibility, there are also issues with the Steam Deck itself. It is new hardware with a new OS and anyone who has received one through the initial preorder process is going through the early stages of community adaptation. Desktop Mode (which we’ll use a lot in this process) is not 100% stable. I regularly ran into lock-ups where I needed to either restart Steam or the Deck. Connecting external displays sometimes required a restart to use the proper resolution. Most of the issues go away once you’re installed and set up. Just don’t get frustrated if you have to restart or lose some progress, I went through the same thing.
Required Hardware to Install WoW On Steam Deck
In addition to your Steam Deck, you’ll want to have a keyboard and mouse you can connect to it to successfully install WoW on the Steam Deck.
- Bluetooth is easiest, just pair and you’re good to go.
- A wireless set that uses a USB adapter can also work, provided you have a USB-C to USB adapter.
- Any wired options will require a USB-C hub, which will allow you to connect several accessories to the Steam Deck at once.
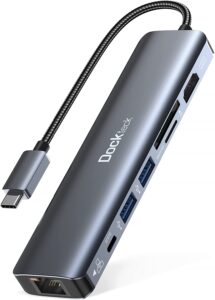
Dockteck 7-in-1 USB-C hub I’m using with my Steam Deck
If you have to buy something I recommend either a Bluetooth keyboard and mouse or the Dockteck 7-in-1 USB-C hub, which has been recommended over and over for use with the Steam Deck.
Once you have a keyboard and mouse connected you can begin the installation process.
Installing Proton-GE
Proton is a compatibility layer that allows Windows programs and games to run on Linux-based systems, such as the Steam Deck. There are several versions of Proton, including one Steam provides. Proton-GE is a community-built version of the software. And is the most recommended version to install WoW on the Steam Deck.
- Boot the Steam Deck to Desktop Mode. Press and hold the power button, then select Desktop Mode from the options. It’ll quickly restart and look more like a PC desktop.
- Click on Discovery (app store looking icon at the bottom) and search “proton”.
- Fnd and click install on ProtonUp-QT.
- Launch ProtonUp-QT.
- Set the Compatibility Tool to Proton-GE and use the latest version.
- Restart the Steam Deck. Press and hold the power button, then select the Restart option. It will boot back to Gaming Mode. You’ll need to once again restart it in Desktop Mode.
Now we have our desired compatibility layer installed and it will be recognized by Steam.
Installing Battle.net App
This set of instructions looks intimidating, but don’t stress out before you give it a try. You will repeat some of these instructions before we’re done, but they’ll become easy once you’ve done it once yourself. This is also the single longest section when it comes to doing an install of WoW on the Steam Deck.
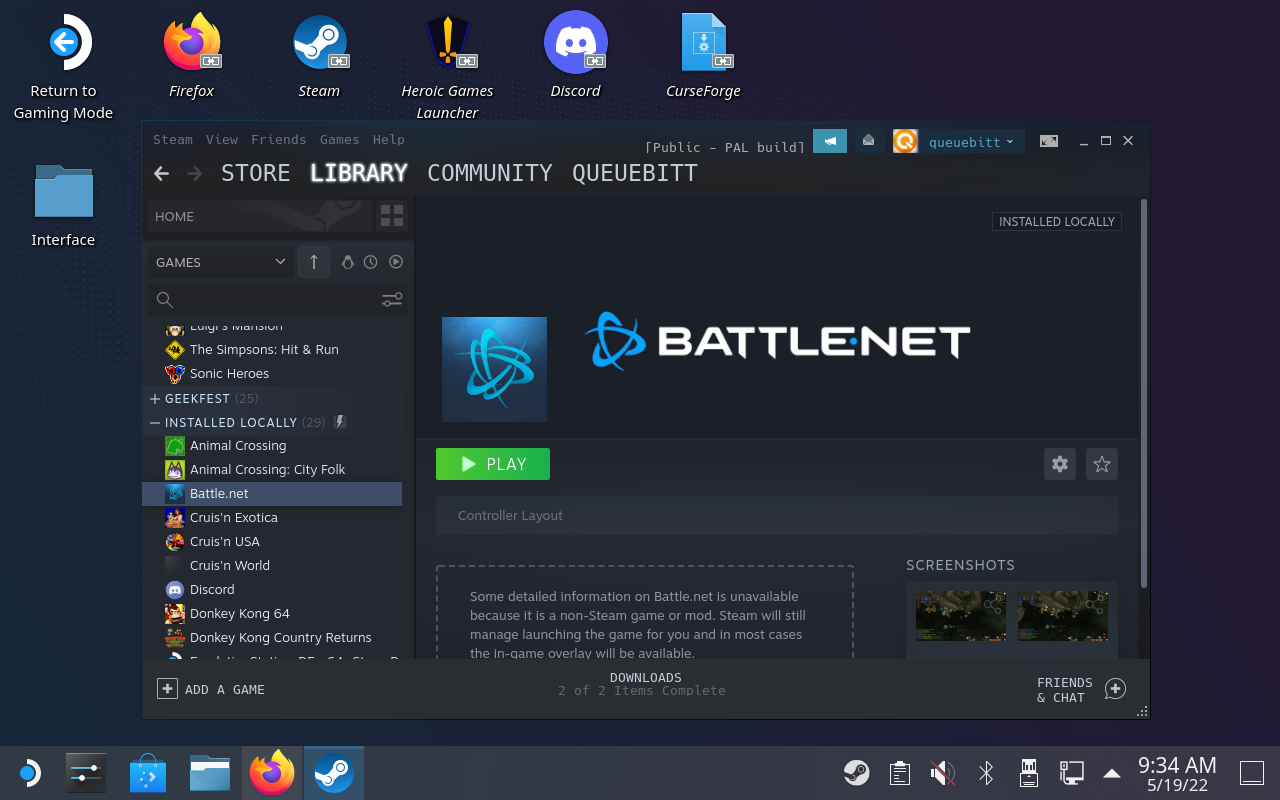
Battle.net installed through Steam
Downloading & Running Battle.net Setup.exe
- Open Firefox (pre-installed, you can also install Google Chrome, Microsoft Edge, and several Linux web browsers from the Discovery app if you like).
- Google “battle.net download” and the first link should be the official download page. Download Battle.net Desktop App for Windows.
- Open Steam, go to Library and click on Add A Game in the bottom left corner.
- Select Add a Non-Steam Game.
- Click Browse.
- Click the upper center pull-down menu and select /home/deck/
- Double click on Downloads.
- Change File Type (bottom center) to All Files.
- Click to select Battle.net Setup.exe, and then click Open.
- Click Add Selected Programs. Battle.net Setup.exe will now appear in your Steam library.
- Right-click on Battle.net Setup.exe and go to Properties.
- Click on Compatibility.
- Select Force the Use of a Specific Steam Play Compatibility Tool, and then select GE-Proton. Close the window.
- With Battle.net Setup.exe selected click Play and the Battle.net installer will launch and run just like it would on your regular computer.
- Disable Launch at computer start and use the default install location.
- Use your hardware keyboard to enter your login credentials. If the Steam touchscreen keyboard pops up click on the keyboard icon in the lower right to remove it. If it repeatedly gets in the way you can use Tab to move the cursor from one field to another. Make sure you click Keep Me Logged In before you log in.
- Battle.net Desktop App should launch and look a lot like it does on your computer. Closeout of the scan for games windows and the tour.
- Close Battle.net.
Running Battle.net App
- In my experience Steam becomes unstable at this point. Exit out of Steam (right-click on the Steam icon in the taskbar and select Exit). Then restart Steam and continue.
- In Steam remove the Battle.net Setup.exe by right-clicking and selecting Remove non-Steam Game. You can now delete the setup.exe from the Downloads directory, too.
- Click on Dolphin (folder icon) in your Task Manager bar.
- In the new window click on the three-line menu in the upper right.
- Select Show Hidden Files, then close the window.
- Go back into Steam and repeat steps 8-11. You’ll be at the selection screen in your Steam Deck’s home directory. Only now you’ll see a lot of directories starting with a period.
- Go through this chain of directories: /home/deck/.local/share/Steam/steamapps/compatdata
- You’ll now see several directories, all with just numbers as their names. One of them contains the newly installed Battle.net. It will be one of the longer numbers and likely the most recently modified directory. To check double click on a directory, then pfx, then drive_c, then Program Files (x86). The right one will have a Battle.net directory.
- Open the Battle.net directory.
- Change File Type (bottom center) to All Files.
- Click on Battle.net.exe to select it, and then click Open.
- Click Add Selected Programs. Battle.net.exe will now appear in your Steam library.
- Right-click on Battle.net.exe and go to Properties.
- Click on Compatibility.
- Select Force the Use of a Specific Steam Play Compatibility Tool, and then select GE-Proton. Close the window.
- With Battle.net Setup.exe selected click Play and then Battle.net should open again and automatically log you in. It may not have saved your login from last time, in which login and again select Keep Me Logged In. It should stick the second time.
- Click on the Blizzard icon in the upper left, and then Settings.
- Set When Clicking X to Exit Battle.net Completely. I also recommend unchecking Launch when the computer starts.
- Click Done. Keep Battle.net open for the next part.
Clean Up
- Go into the Downloads directory and delete the Battle.net setup.exe you downloaded.
- In Steam, right-click on the setup.exe, select Manage, and remove it from your Steam library.
Installing WoW to the Steam Deck
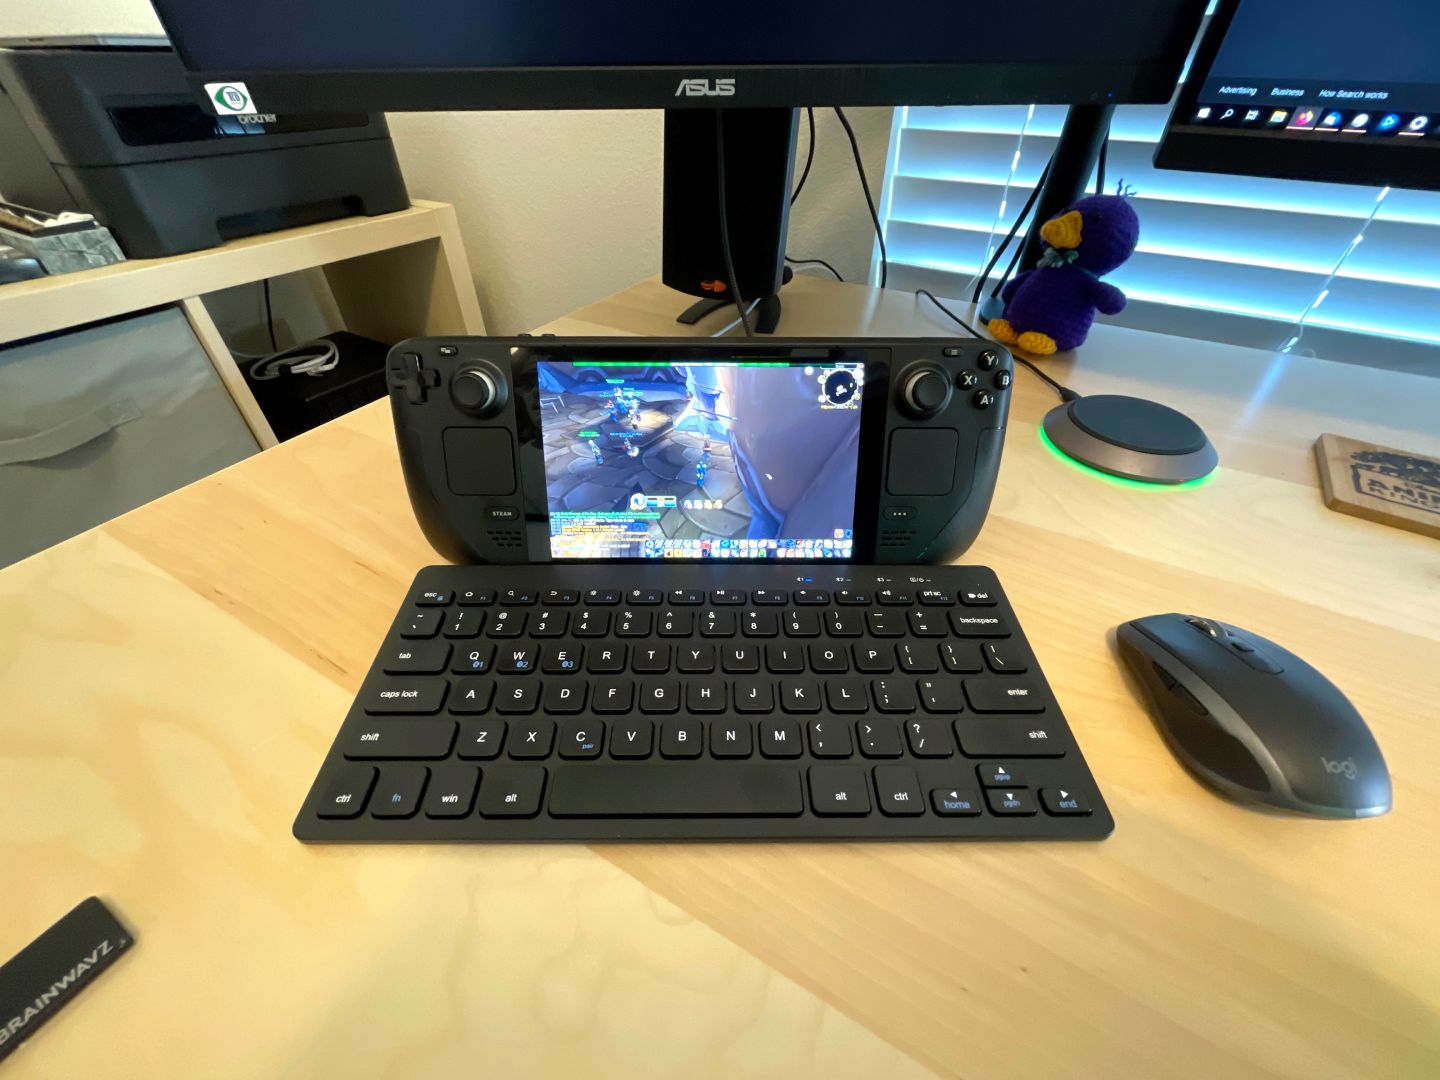
WoW running on Steam Deck
This section will work with any game installable by the Battle.net App, including doing an install of any versions of WoW on the Steam Deck.
- With the Battle.net App open select your desired game and click Install.
- Once again, allow it to use its default install location but you should disable the desktop shortcut.
- Your game will download and install just as it would on a computer. Please note a Steam Deck on Wi-Fi will have a slower download than a PC on a wired connection. You need a USB-C hub or USB-C to Ethernet adapter to connect to a wired network.
- Once installed click Play to launch your game and make sure it starts up okay. Once verified close the game.
Using Battle.net vs WoW.exe
You can repeat steps 24-33 in the Installing Battle.net App instructions and add the WoW.exe directly to Steam. But just like on a computer you’ll have to enter your login info and authenticator every time you open the game. You’ll also still need to go into the Battle.net app to run game updates. Overall it is easier to just keep Battle.net in Steam and get into your Blizzard games that way.
Gaming Mode vs Desktop Mode
You can launch Battle.net (or WoW) through Steam in both Gaming Mode and Desktop mode. Both modes will allow you to run Discord and other apps at the same time as WoW. And both will allow you to use a connected keyboard and mouse.
That said, I found Desktop Mode to be a bit more stable when running Battle.net games and easier to reset if the software gets hung up. Each time I had Battle.net/WoW, Discord, and the TradeSkillMaster app running in Gaming Mode at least one of them would lock up when I tried to close them. That requires a full restart (which granted is fast) to overcome. In Desktop Mode similar issues are less frequent, and can usually be resolved by exiting Steam and restarting that software.
Add Custom Artwork to Battle.net and Other Non-Steam Games
All non-Steam games and apps you add will appear with blank, gray rectangles in Steam’s library. You can add their artwork to make these items look nicer. This is an optional step to doing an install of WoW to the Steam Deck.
Box Art & Banners
- In Desktop Mode, open your web browser and go to https://steamgriddb.com.
- Search for the game/app you want artwork for.
- You’ll want to get box art (tall rectangle) and a banner (wide rectangle).
- Click on the ones you like, then right-click on the image to save it. Be sure to rename it to something you’ll recognize (i.e. Battle-banner). I recommend saving these images to a “Steam Art” directory under Pictures, in case you need them again later.
- If the first site didn’t have any banners you like you can also check out https://steambanners.booru.org.
Icons
- You’ll also want icons, which are squares. Your best bet for those is to Google “battle.net icon” and save (and rename) the ones you like.
- In Steam (still in Desktop Mode) go to your library and view by collections. Find the game you want to add the artwork to under Recent Games.
- Right-click on the blank rectangle, go to Manage, and select Set Custom Artwork.
- Select /home/deck from the pull-down menu, then navigate to where you saved the images.
- Select the box art file you saved. You may need to change File Type to All Files to see it.
- Find the same game in the list on the left side and click it to select it.
- Right-click in the banner area and select Set Custom Background.
- Again, navigate to your saved images and select the banner.
- Right-click on the game in the list to the left and select Properties.
- Click in the blank icon square next to the name.
- Once again, navigate to your saved images and select the icon. You can also rename the game/app if you like.
The box art under collections is the most critical if you want your Steam library to look nice when in Gaming Mode. The other two mostly just help the aesthetics when in Desktop Mode.
For Battle.net you’ll need to do this manually, as instructed above. But for many non-Steam games, you can also try SteamGrid, which is a program that runs and applies missing artwork to many games.
Creating a WoW Directory Shortcut

My WoW directory location on Steam Deck
If you plan to use addons or copy over settings from another device then you’ll need to create a shortcut to your WoW directory. It will make setting up any addon managers you wish to install to support WoW on the Steam Deck much easier. It also makes maintaining your WoW settings much easier given the more complicated Linux file system.
- Click on Dolphin (folder icon) in your task manager bar.
- Click on Home on the left.
- Go through this chain of directories: /home/.local/share/Steam/steamapps/compatdata
- You’ll now see several directories, all with just numbers as their names. One of them contains the newly installed World of Warcraft directory. It will NOT be the same folder as Battle.net. It will be one of the longer numbers and likely the most recently modified directory. To check double click on a directory, then pfx/drive_c/Program Files (x86). The right one will have a World of Warcraft directory.
- Drag the entire World of Warcraft directory to Home on the left.
- At the prompt select Link Here. Do NOT move it, or you’ll break Battle.net’s link to it.
- You’ll now see a World of Warcraft directory in Home with italics. That is a shortcut to the real directory.
- You can also drag either the original directory or the new shortcut to the left side under Places for a quick access shortcut.
If you ever reinstall WoW this shortcut will break and you’ll need to create a new one. Each install ends up in its own, uniquely numbered directory.
Installing WoW Addons & Settings to the Steam Deck
If you want to use the same addons and settings you use on your computer you have a few options. I ended up doing a combination of two to get things copied over exactly and set up to maintain easily.
Copy Settings & Addons Manually
For this section, you’ll need a USB-C flash drive or a USB flash drive and a USB-C to USB adapter.
I find this to be the best first step when trying to get my WoW setup on a new device. You only need to do it once, and then you can use an app to keep everything up-to-date and in sync.
- On your primary WoW computer plug in the USB flash drive. Then go to your World of Warcraft folder, typically under Applications (Mac) or Program Files (x86) (Windows).
- Copy the Interface and WTF folders to your flash drive.
- Eject the flash drive and connect it to your Steam Deck while in Desktop Mode.
- Click on the flash drive icon in the lower-right taskbar and select open and mount for your flash drive. Click open again if a window doesn’t open showing its contents.
- In the Dolphin window right click on Home and select Open In a New Window.
- In the new window go to Home, then your WoW shortcut.
- From the flash drive drag the Interface and WTF folders into the WoW folder. Select Copy when prompted.
Keep the Interface and WTF folders on your flash drive for a while. Just in case setting up and syncing your addons causes a loss of data later on.
Your addons and all game settings are now loaded to the Steam Deck. You should start WoW (open Battle.net in Steam, then WoW through Battle.net) and log into a character. It should look much like it does normally, just on a smaller screen. Note custom action bars may be overlapped due to the smaller screen resolution.
Lower Your Graphics Settings
While checking out your addons and settings you probably need to lower the graphic settings on your Steam Deck copy of WoW, especially if your regular PC has a dedicated GPU. Your install of WoW on the Steam Deck will work at any setting, but keep in mind the Deck may have lower specs than your main gaming PC.
Using WoW’s Graphics Quality scale in the settings:
- 7 is what WoW recommends for the Steam Deck using its built-in display.
- 3 is what I ended up needing to use when I tested running WoW while connected to a 1440p display. In that configuration, I was pushing the Steam Deck’s processor and GPU pretty hard.
- Click the Recommended button and apply it to only these settings to see what WoW recommends based on your setup (if connected to a larger display).
CurseForge for Linux
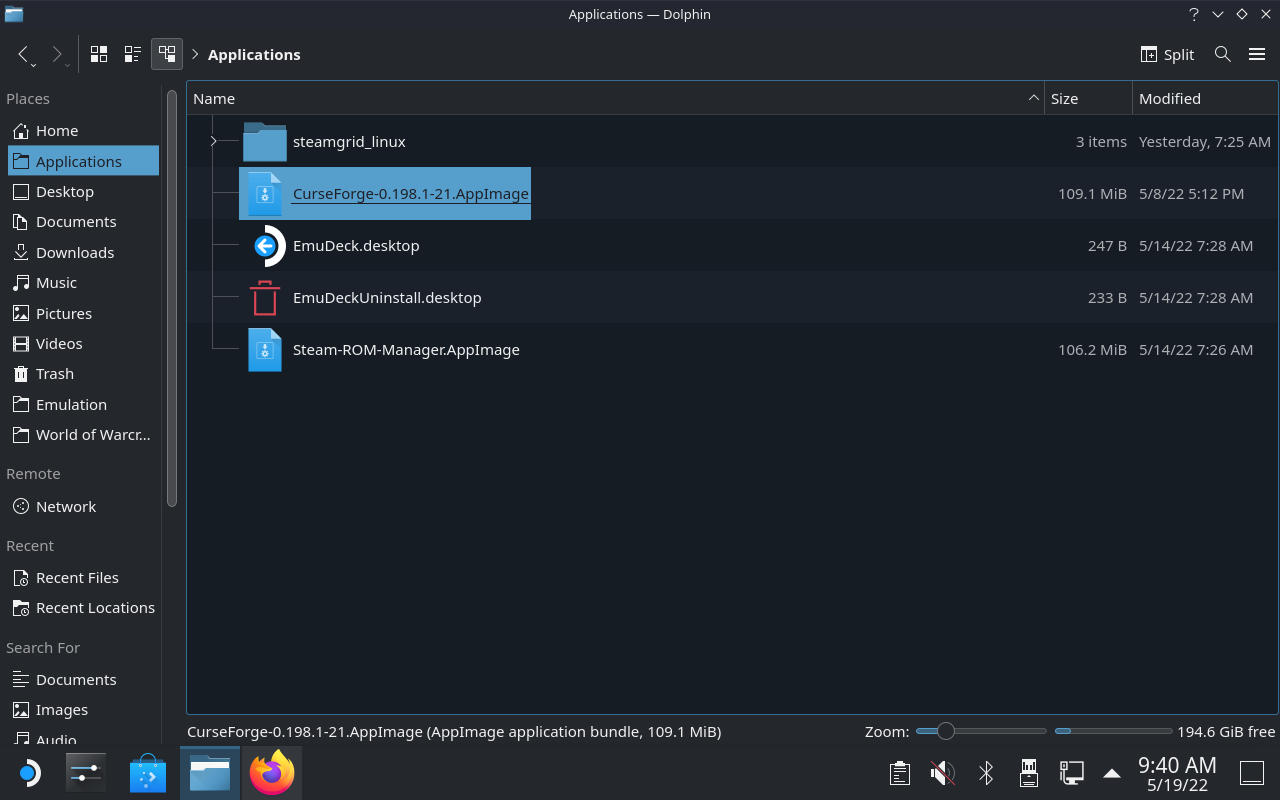
CurseForge’s AppImage file for Linux
CurseForge is the mod manager I would recommend you use for WoW on the Steam Deck. They have a native Linux version that only supports WoW (all variations) and does not include Overwolf, as they require on Windows. To get the most out of CurseForge you’ll also need to use it on your primary WoW computer.
- In Desktop Mode open your web browser and go to https://download.curseforge.com.
- The Linux version should automatically appear, click Download.
- You’ll download an AppImage. It contains the app and all the files the app needs to run.
- Go to Downloads (open Dolphin with the folder icon and Downloads should be on the list on the left side) and click on the CurseForge AppImage. If it prompts you to allow it to execute then do so.
- Click on Manually Add a Game, as CurseForge will not be able to find WoW through a scan.
- Go to Home, then the World of Warcraft short you created previously (instructions above), and then select _classic (or whichever version of WoW you’re doing). Click Open.
- CurseForge should now be linked to your WoW install and display any currently installed addons.
I recommend moving the AppImage file out of Downloads. Two popular options are either the Desktop or in an Applications directory in Home (you may need to create it).
Sync CurseForge Between Devices
CurseForge provides the best sync option for WoW addons as of this posting. It is easy to set up on both your Steam Deck and regular gaming computer. Before you sync you need to get CurseForge setup to your liking on your main computer.
- On your primary WoW computer, open CurseForge and click on Sync.
- You may be prompted to log in to Twitch. This is a holdover from when Twitch owned CurseForge. You will need to create a Twitch account if you don’t have one.
- Enable AddonSync.
- Select or set up a new Sync Profile.
- Enable Auto Sync, Auto Uninstall, and Auto Backup Addon Settings.
- Upload your computer’s settings for your first sync.
- On your Steam Deck open CurseForge and repeat the same steps, making sure to join the same Sync Profile.
- On your Steam Deck, you’ll want to download for your first sync, bringing in your main computer’s settings.
Syncing should now occur automatically. You’ll just need to remember to occasionally open CurseForge on both your computer and your Steam Deck.
WoWUp for Linux
WoWUp is another popular mod manager which also offers a native Linux version. But I don’t recommend it for two reasons. One, they recently lost access to the CurseForge API. This means a lot of popular addons can no longer be managed by WoWUp. Two, they don’t offer a sync function. But if you would prefer to use WoWUp over CurseForge here you go.
- In Desktop Mode open your web browser and go to https://wowup.io.
- WoWUp for Linux should appear automatically, click Download Now.
- You’ll download an AppImage. It contains the app and all the files the app needs to run.
- Go to Downloads (open Dolphin with the folder icon and Downloads should be on the list on the left side) and click on the WoWUp AppImage. If it prompts you to allow it to execute then do so.
- Go to Options, and then Clients.
- Click on Add New (you cannot successfully scan for your WoW install).
- Click on Home on the left, then the World of Warcraft shortcut you created (instructions above), then open _classic (or whichever version of WoW you wish to add). Finally, select the WoW.exe file and click on Open in the lower right.
- WoWUp will take a moment to scan your directory and will auto-populate any addons already installed.
I recommend moving the AppImage file out of Downloads. Two popular options are either the Desktop or in an Applications directory in Home (you may need to create it).
Installing Discord
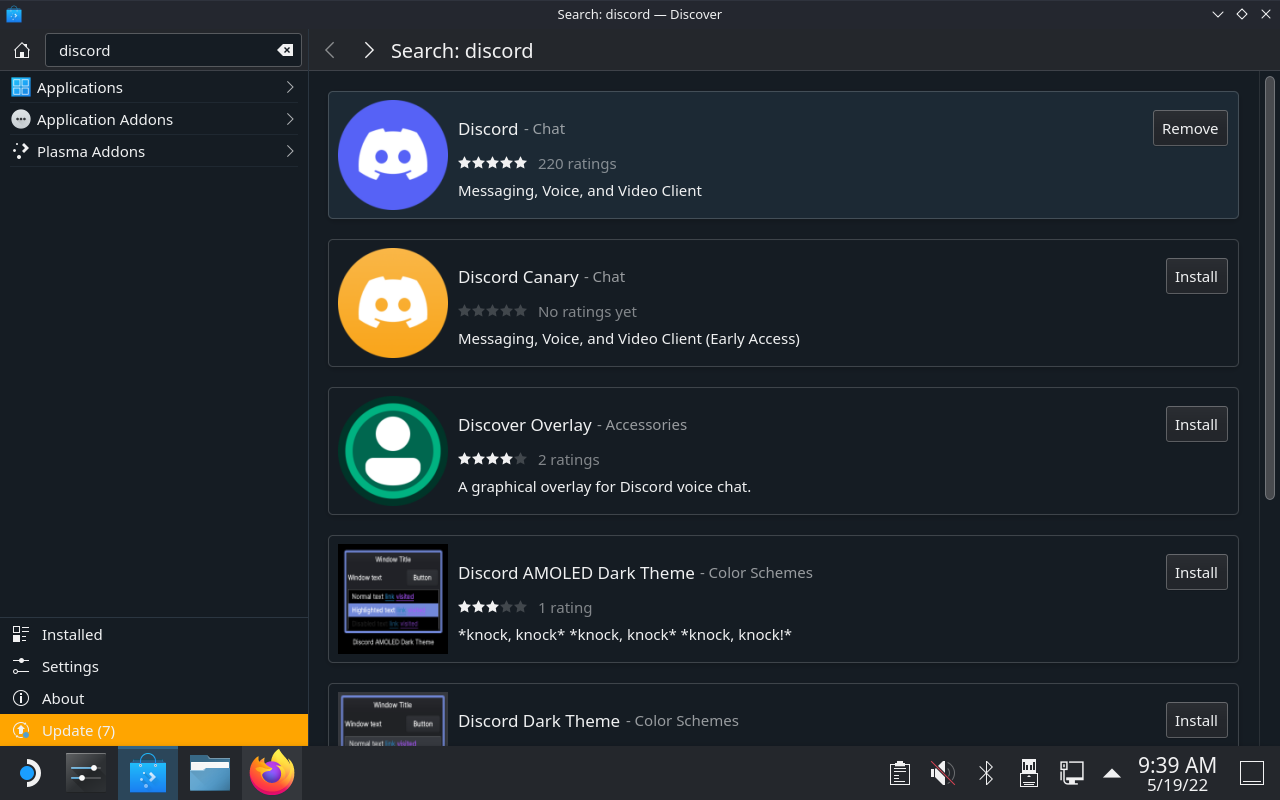
Discord install through Discover on Steam Deck
Discord has a Linux native version which can easily be installed. And it can be run alongside your install of WoW on the Steam Deck without issue.
- Click on Discover in the taskbar (app store looking icon).
- Search for “discord”.
- Click Install.
- Open Application Launcher in the taskbar (Steam Deck icon).
- Go to the Internet section and you’ll see Discord.
- Right-click on Discord and select Add to Desktop. That’ll produce an easy to access shortcut if you plan to use Discord in Desktop Mode. You may also want to add it to Favorites under the Application Launcher.
- Open Steam and go to Library.
- Click on Add a Game, then select Add a Non-Steam Game.
- Discord will already be on the list. Select it and click Add Selected Programs.
While in Desktop Mode you can open Discord directly, either from the desktop shortcut or the Application Launcher. We add it to Steam so you can also open it while in Gaming Mode. Discord can run alongside any game, so you can use it for voice chat while gaming like you do on a PC.
ConsolePort Addon for WoW On Steam Deck
ConsolePort is a WoW addon that allows you to play the game on a controller and minimizes many of the inconveniences of trying to go without a keyboard and mouse. A tool worth considering, as you’re wanting to install WoW on a Steam Deck without a built-in keyboard.
- In the CurseForge app install ConsolePort. Or download it from CurseForge’s website and manually add it to your Interface/AddOn directory.
- Open WoW and enable ConsolePort on the characters you like, then log in.
- On your first login, you’ll go through the setup wizard. Don’t freak out over the message to reset keybindings, it kept the primary bindings and only reset the secondary.
ConsolePort has a nice gaming interface and works hard to fill in all the MMO needs. A lack of a full keyboard for communication is its biggest weakness, as well as any muscle memory you’ve established. You will not like it on your first try, but if you want to play WoW with just the Steam Deck in your hands you should practice and tweak the addon for a while before giving up. Also, look up some ConsolePort-specific guides on YouTube.
For myself, I have it set up to run on my bank alt only. I can go through my mail and auctions easily enough without retraining over a decade of MMO muscle memory. When playing on my regular characters I’ll be sticking to the keyboard and mouse.
Installing TradeSkillMaster
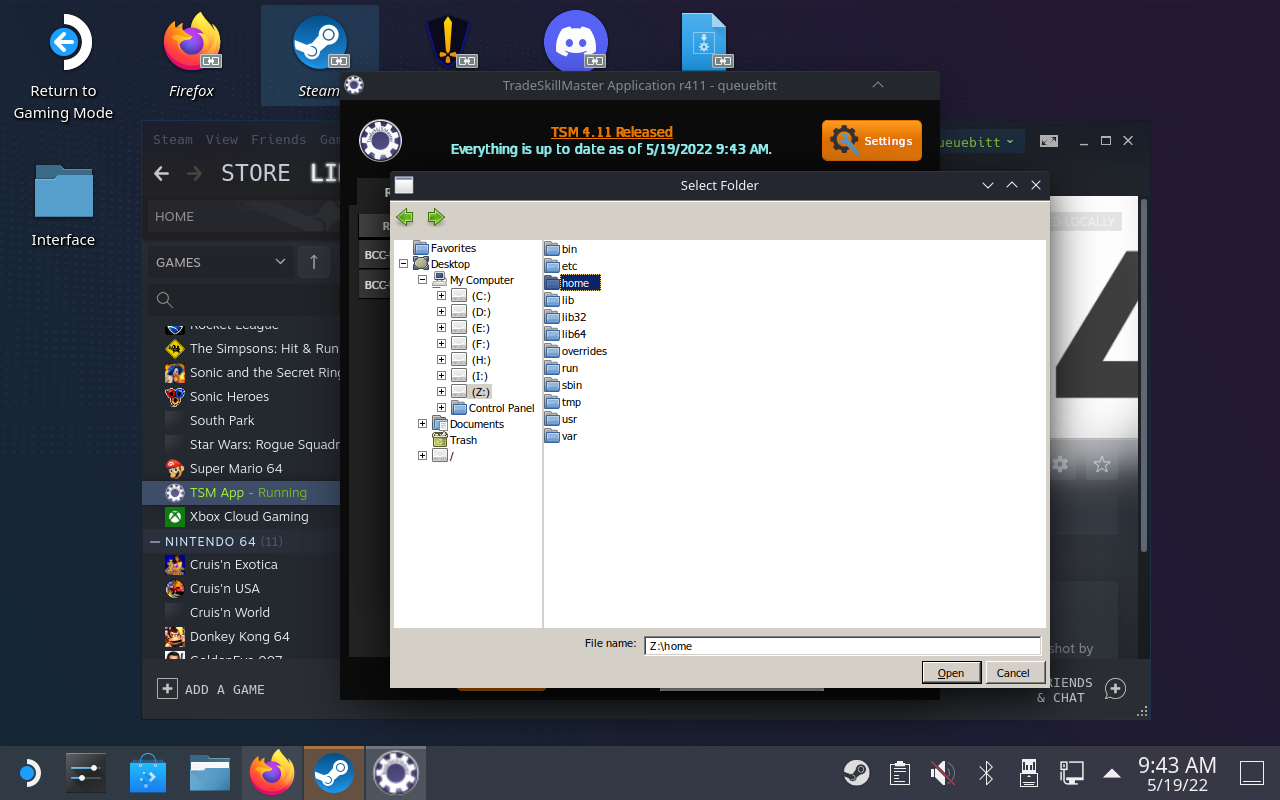
TSM browsing for WoW directory
TradeSkillMaster (TSM) is an advanced auction house addon system that uses both WoW addons and a desktop app. If you don’t regularly use it you can skip this section of the install WoW on a Steam Deck guide. My gold-making efforts live and die by TSM, so I wanted it fully functional on the Steam Deck. My top reason for logging into WoW away from home is running auctions.
AddOn
The addon part gets installed and set up when you sync your addons and setting with the Steam Deck. As long as you copied over your WTF folder you’ll have all your data and settings in TSM on the Deck.
Decktop App
If you don’t install and run the TSM app you’ll get a warning at login, won’t have access to AH scan data, and can’t sync your TSM data between devices. So you’ll get the best results with the app installed, but you’ll need to do it using Steam and Proton as you did for Battle.net.
Installing TSM Desktop App
- In Desktop Mode open your web browser and go to https://tradeskillmaster.com.
- Click Install TSM.
- Under TradeSkillMaster App click Download (Windows). You may be prompted to log into your TSM account first.
- Open Steam, go to Library and click on Add A Game in the bottom left corner.
- Select Add a Non-Steam Game.
- Click Browse.
- Click the upper center pull-down menu and select /home/deck/
- Double click on Downloads.
- Change File Type (bottom center) to All Files.
- Click to select setup.exe, and then click Open.
- Click Add Selected Programs. setup.exe will now appear in your Steam library.
- Right-click on setup.exe and go to Properties.
- Click on Compatibility.
- Select Force the Use of a Specific Steam Play Compatibility Tool, and then select GE-Proton. Close the window.
- With setup.exe selected click Play and the TSM App installer will launch and run just like it would on your regular computer.
- Run through the installer as normal, allowing it to install in its default location.
- Once the app is installed and launched I recommend closing it and then closing Steam, as Steam can get wonky after such installs.
Setting Up TSM Desktop App
- With Steam restarted you can remove the setup.exe from the library list and later delete it from Downloads.
- Click on Add A Game in the bottom left corner.
- Select Add a Non-Steam Game.
- Click Browse.
- Click the upper center pull-down menu and select /home/deck/.
- Go through this chain of directories: /home/.local/share/Steam/steamapps/compatdata
- Once again, look for a long number directory most recently modified. To check it go into pfx/drive_c/Program Files (x86) and look for the TradeSkillMaster Application directory.
- Go into the TSM App directory, then app, and change File Type to All Files.
- Select the TSMApplication.exe and add it to the Steam library.
- Right-click on TSMApplication.exe in Steam and go to Properties.
- Click on Compatibility.
- Select Force the Use of a Specific Steam Play Compatibility Tool, and then select GE-Proton. Close the window.
- Open TSM App from Steam.
- Click on the Settings button, then click Browse.
- Click My Computer/Z/home/deck/ and then click on World of Warcraft to select it, and then click the Open button.
- Disable all four checkboxes, starting with Run at Startup.
- Go to Notifications and disable everything.
- Click Done.
- If the app is complaining about TSM_AppHelper missing check your addons directory in World of Warcraft/Interface (use your shortcut). Change “addons” to “AddOns” and that should correct the issue.
- Close TSM App and restart it and it should come up normally.
Syncing TSM Data
In my testing, CurseForge’s sync did not properly sync my TSM data between my gaming PC and my WoW install on the Steam Deck. You can manually copy the WTF directory between devices, which is where your TSM data lives. Or you can pay for the TSM premium service and get cloud backup storage, which you can use as a manual sync.
Click on the Backups tab and you’ll see a list of backups. Remote Backup is from another device. In most cases when switching devices you’ll want to double click on the most recent Remote Backup. That will download it to your current device. Repeat the same process when you switch devices again.
Please note that TSM only does a backup every hour at most and the sync is not automatic. You’ll need to download the most recent Remote Backup whenever you change devices.